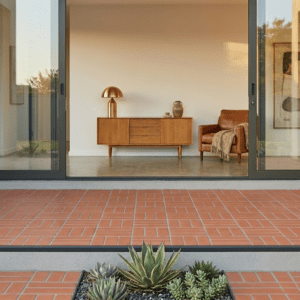
 Most patio upgrades in South Africa fall into one of two camps: expensive full-brick paving that takes weeks and a structural sign-off, or cheap ceramic tiles that crack the first winter they meet frost. Klompie tiles sit in a smarter middle ground, giving you the texture and warmth of real clay brick without either problem. If your patio has been on the “one day” list for a while, here’s what actually goes into using klompie tiles well.
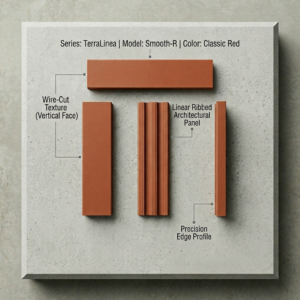
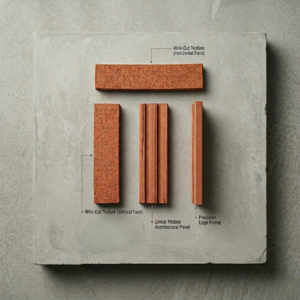
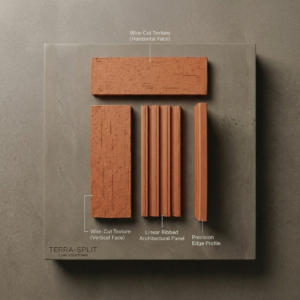
Klompie tiles are a slim, 225 × 50 mm brick-format tile made from natural terracotta clay. Unlike standard bricks, they install directly onto a prepared surface using tile adhesive, which makes them far quicker and lighter to work with than a structural brick paving job. The narrow profile creates tighter grout lines and a more detailed, decorative pattern than wider brick tiles, which is exactly why they show up so often in high-end patio and courtyard renovations.
You can view the full specification on our Terracotta Satin Klompie Tile product page, including box coverage and calculator tools.
Terracotta is naturally weather-resistant, which is exactly why it’s been used on South African stoeps for over a century. According to the Clay Brick Association of Southern Africa, fired clay products are resistant to South Africa’s frost levels and absorb and release moisture without the discolouration that affects some manufactured alternatives — a fair summary of why terracotta patios still look right decades on.
From coastal humidity in Durban to dry heat in Gauteng, terracotta handles the swing without warping or fading the way some composite decking products do. Klompie tiles also handle foot traffic well once properly sealed and grouted, and their earthy tones only deepen with age rather than looking tired.
The slim profile reduces structural load on existing patios, opens up a wide range of lay patterns, and complements wood decking, natural stone, and steel features without fighting any of them for attention.
If your patio is built around a built-in braai, klompie tiles are a natural fit. The earthy terracotta tone sits comfortably alongside exposed brick braai structures, cast iron grids, and stacked firewood without looking mismatched, and the tile’s durability means it shrugs off the odd stray coal or splash of marinade far better than a painted or ceramic surface would. Soot marks and ash residue wipe away easily once the tiles are sealed, so the area around the fire stays looking sharp season after season. Many homeowners extend the same klompie tiles from the main patio floor up onto a low wall or built-in seating ledge around the braai, tying the whole entertainment zone together in one consistent material.
Klompie tiles come in two textures, and the choice changes the entire mood of a patio. Satin gives you a smooth, contemporary surface that reads clean in photos and in person. Travertine introduces natural texture and colour variation for a look that feels older and more rustic from day one. If you’re on the fence, our detailed comparison in Satin vs. Travertine Finish: Which Klompie Tile Suits Your Space? walks through exactly where each one shines.
Each box of klompie tiles covers 1 m² using a 10 mm mortar gap, at roughly 72 tiles per box. For larger patios, always add 5–10% extra for cuts and pattern wastage, particularly if you’re using a herringbone or brick bond layout rather than a straight lay. For a full breakdown of quantities, patterns, and subfloor prep across our terracotta range, see The Ultimate Guide to Terracotta Quarry Tiles for Patios and Courtyards.
A clean, minimalist option that suits smaller patios and modern homes where you don’t want the flooring competing with the architecture.
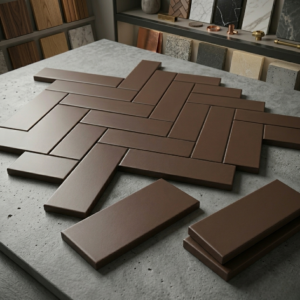
The traditional, classic choice — staggered joints that read as timeless rather than trend-driven, and forgiving of small measurement errors during installation.
The premium option. More cutting and more wastage, but a genuinely high-impact finish that’s worth it on a feature area like an entertainment patio or braai zone.
While we always recommend a qualified installer for outdoor flooring, the general process for laying klompie tiles on a patio includes:
Because terracotta is porous, sealing is the step people skip and regret. For the full walkthrough, see our guide on How to Seal and Waterproof Terracotta Tiles in South Africa.
Many homeowners combine klompie tiles with larger format Terracotta Quarry Tiles to create a layered patio design — klompie tiles on a low feature wall or border, with quarry tiles across the main floor area. Edges and steps can be finished neatly using Terracotta Quarry Tile Bullnose trims for a safe, professional result that doesn’t look like an afterthought. Browse the full brick tile range to see how the formats work together.
Cost is usually what decides how far a patio upgrade actually goes, so plan quantities and finishes before requesting quotes rather than after. Klompie tiles are priced per box, with each box covering roughly 1 m², so calculating your total patio area first gives you an accurate baseline. Factor in adhesive, grout, sealer, and bullnose edging separately, as these are rarely included in a per-box tile price. For larger patios, ordering in bulk can bring per-unit costs down, and it’s worth asking about trade or contractor pricing if you’re working with an installer.
South Africa’s climate varies enough by region that a one-size-fits-all approach doesn’t quite work.
In Durban or Cape Town, salt air and higher humidity mean sealing quality matters more than usual, and a UV-rated exterior sealer is strongly recommended over a generic one.
In Gauteng and the Free State, patios face intense summer sun and occasional winter frost, both of which terracotta handles well once properly sealed. Regardless of region, always let adhesive and sealer cure fully before exposing the patio to heavy rain or foot traffic, since premature exposure is one of the most common causes of early tile failure.
Once you know roughly how many square metres you’re covering and which finish and pattern you like, the fastest way forward is a proper quote rather than guesswork. Our team can confirm quantities, talk through Satin versus Travertine for your specific patio, and put together pricing for tiles, adhesive, and sealer as one package. Get in touch with Brick Tile Shop to start planning your patio upgrade.
Yes. Klompie tiles are made from durable terracotta clay and, once properly sealed, perform well in outdoor conditions across South African climates.
Each box covers 1 m² and contains approximately 72 tiles when installed with a 10 mm mortar gap. Always add 5–10% extra for cuts and pattern wastage.
In most cases yes, provided the existing surface is level, stable, and properly prepared. A professional assessment is recommended before installation.
Yes. Terracotta is porous, so sealing is strongly recommended to protect against weathering, staining, and moisture absorption.